For my first SWE apprenticeship portfolio project, I had to make something in JavaScript. I decided I would do something which challenged my front-end skills and help me later on. I needed a tool which could visualise API data side by side, terminals are good, but begin to merge together into one when you’re running so many things at once.
My end goal for this project was a flexible user interface expandable to accommodate many different types of displays at once, these displays could be adjusted in size or removed if they were no longer useful.
And so I started on OpenMirage.
Learning plan
While I had the basics to this, I still needed to structure a learning plan to ensure I was doing my best work. I had 4 weeks total to learn, and build this project, and the first draft was due on Wednesday in week 2. So I made a plan which fit my learning style of learning then application:
- Week 1
- Day 1 – This was brainstorming. By the end of day 1 I had a visualisation of what I wanted OpenMirage to be, and had created basic plans on GitHub to track what I needed to do
- Day 2 & 3 – This time was dedicated to wireframing and learning more about it. I needed to make sure I followed best practices, and make a design which was thorough enough that I wouldn’t stray from it
- Day 4 & 5 – This time was for working out how to best make a server for performing the requests. I had multiple ideas in my head and wanted to settle down after debating which technique was the best
- Week 2
- Day 1 & 2 – This time was for the front end. This was definitely the most complex interface I had done, not just in React, but in any code, so I needed to take the time to learn it properly. The logic was also going to be incredibly difficult, as countless properties had to be tracked for each view
- Day 3 – The draft of the project is due. I wanted a MVP which could demonstrate a good basic for how this could be useful and how it was efficient
- Day 4 & 5 – Incorporate feedback. I was assuming I was going to get some level of feedback on this project, this was the time to review what that meant and any implications
- Week 3
- Day 1 & 2 – Refine the server elements. Add validation, refactor, add comments, split up into more files if necessary to improve maintainability
- Day 3 & 4 – Refine the front-end. Add different themes, work on accessibility, make more mobile friendly.
- Day 5 – Deployment. They say never deploy on a Friday, but thankfully this isn’t live for another week.
- Week 4
- Day 1 & 2 – Testing. Run through some standard tests, debug any issues.
- Day 3 & 4 – Prepare the presentation for day 5.
- Day 5 – Presentation day
Planning
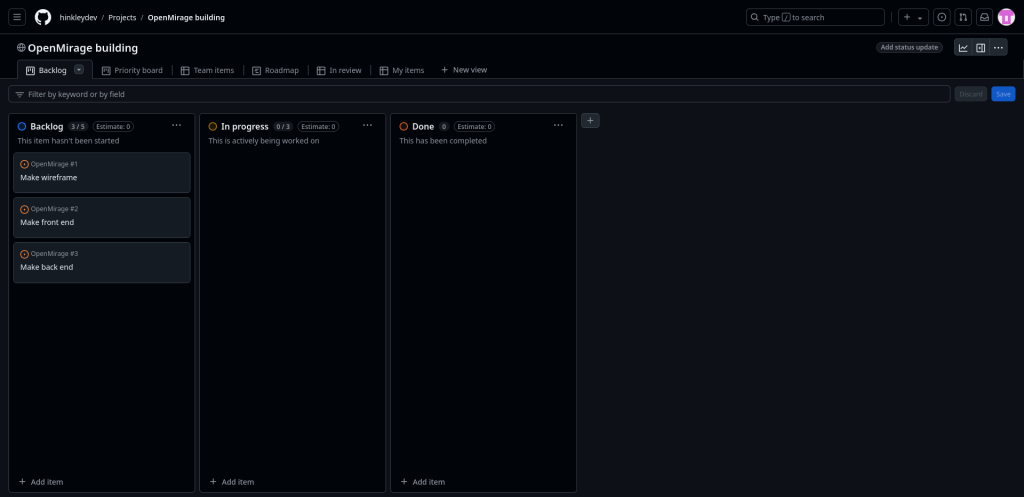
I decided to start planning using GitHub issues and projects, as that’s what I was learning in the apprenticeship. I created a basic project board on GitHub, making a few issues to track the main sections of the project.
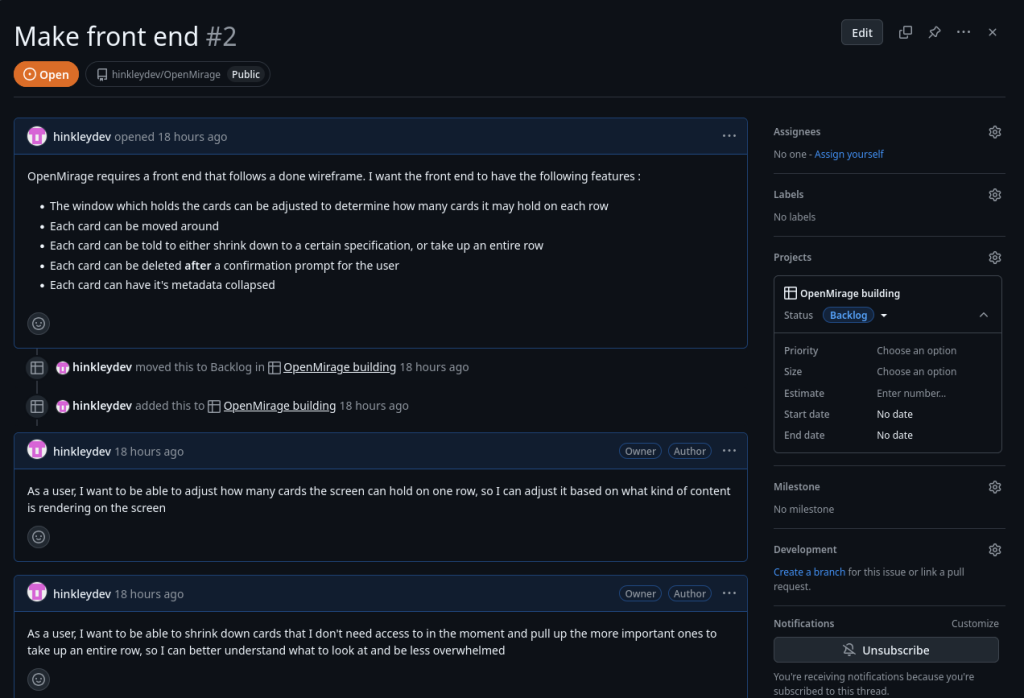
Each issue contained comments, these contained user stories which gave more insight into what needed doing.
Also, as it turns out, AI will try to solve issues for you on GitHub, which is useful… except it entirely misunderstand the issue I wrote.
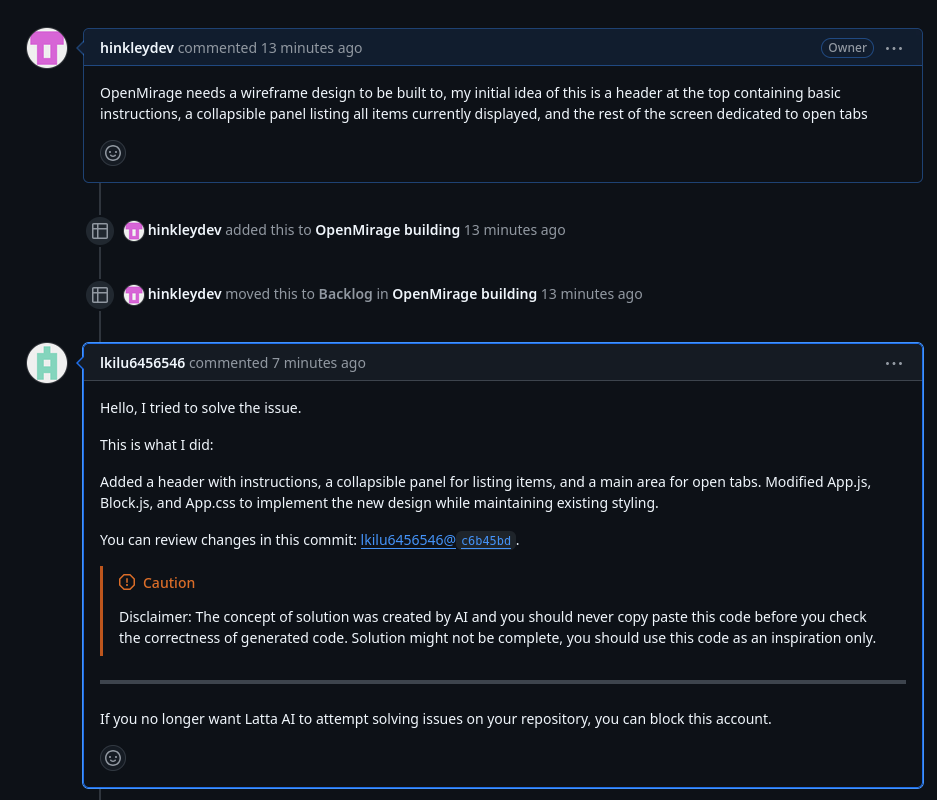
Well, can’t blame it for trying I suppose.
Wireframing
If I’ve learned anything in my short career, it’s the all the success comes from all the boring stuff you don’t want to do. Wireframing isn’t the exciting cool thing you feel hyped to do, but nothing kills my motivation than stalling on a project because I don’t know what to do next.
I needed three wireframes:
- A root overview of the site – A very rough view of how the site would be organised
- A card view – A detailed view of how each card would look like
- A prompt view – A form that users could add cards through
As a default, I try to stay away from web based services when app alternatives are available, so my first thought was to use LibreOffice Draw. However, it’s not optimised for wireframing, so I decided to try Wireframe.cc which I’ve seen other apprentices use.
As it turns out, Wireframe.cc is quite good for basic designs. I certainly found working with it to be faster than LibreOffice Draw.
As a rule I generally didn’t do wireframes, since before this I was only doing front end development in a personal project context. This was a first for me, but I can definitely see how it helps you remain focused.
I generally felt a bit overwhelmed during this process, but since I dedicated 2 days to this, I knew I had plenty of time to learn and perfect my work, which helped me focus more.
After a few days of refining a wireframe, this was my first draft.
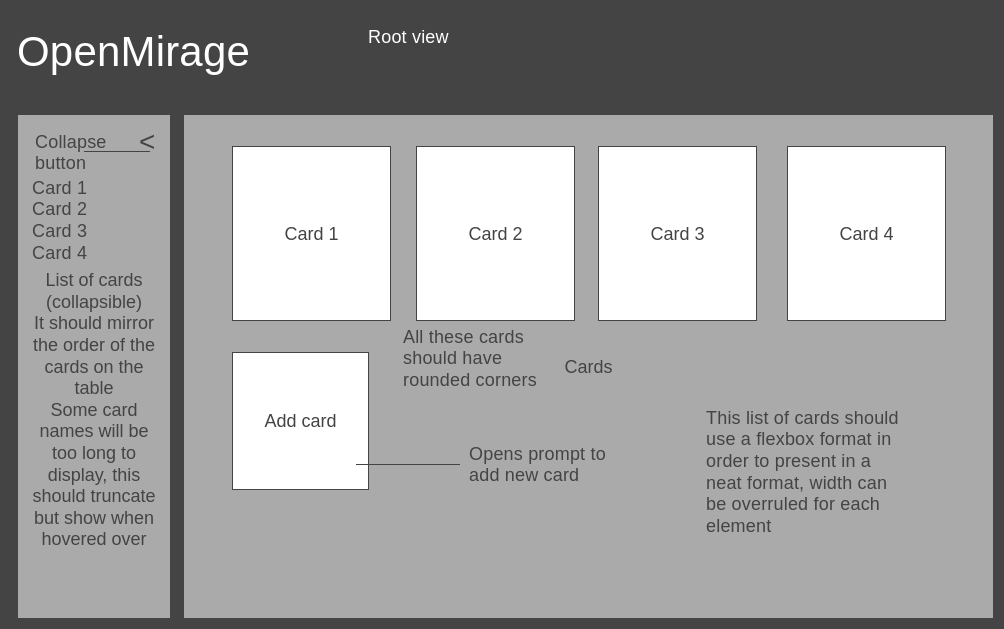
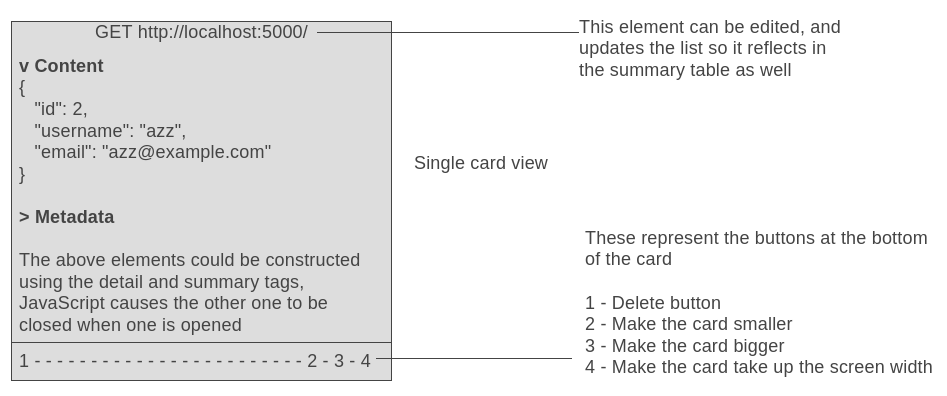
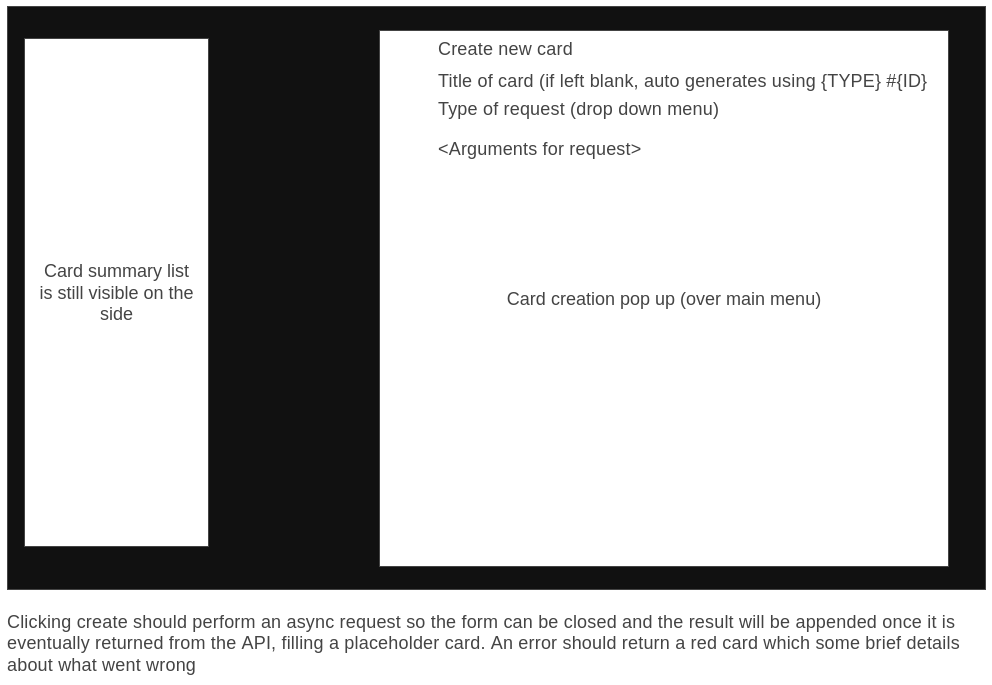
I noticed a lot of Shiny Object Syndrome occurring when I was working on this wireframe. Lots of ideas jumping out at me, but the process makes it easier to ignore those and focus on the whole picture.
Back end
I started with building out a file structure for the server code. It never really occurs to me, but every time I restart a new project I have to recall the best way to organise the files. This doesn’t take a huge amount of time but it’s probably best I build some kind of template for the future. Oh well, I’ll add it to my todo list, and I’ll put it here when I’m done.
My end goal was to make it modular, so I decided to add functions via a JSON file. However that does quickly run away, trying to access a JSON file, to access an array, to access an item of the array, to get the key of the object. I decided I needed some encapsulation to make it nicer.
That ended up being a wise decision, because as I got further into the code it became so complex that it was almost overwhelming to look at.
// Return an array of options
function getArguments(option) {
    const object = getOption(option); // The key is passed in so we get the object
    const key = Object.keys(object)[0];
    const command = object[key]; // Get the command

    const list = command.matchAll(parameterRegex);
    const arr = Array.from(list); // This pulls the parameters from the command
    let value; let results = [];
    for(let item in arr) {
        value = arr[item][0]; // Convert from array to string
        results.push(value.slice(1, -1)) // Remove the bracks and add to the array
    }
    return results;
}
I encountered my confusing issue in trying to make the endpoint that acts on any requests. I had to think about how the program was going to accept custom arguments, and pass them dynamically into a command line.
Thankfully, I already did the hard work in making a function that could extract the arguments from a command, so now I just needed to understand how to map those. So I started there.
As it turns out, this wasn’t too hard. It was just a simple case of getting all the arguments and doing a string replace with the body elements of the request.
This left me running ahead of schedule, so I decided to add some more functionality. The nmap functionality I specifiied in the issue was trivial to add, so I decided to aim for something a little more specific.
You might have seen the GitHub rest API. Very extensive piece of kit, but returns way too much, 35 lines, so I wondered, is there a way to cut this down and have something more practical?
My first thought was to write some basic Python to parse the data, but I soon realised that was overkill for the situation. So my next idea was to try piping it into grep.

-s option blocks the loading output to make it cleanerWorks! At least it does till you look for the name field

Thankfully, you can use the quotation marks to specify exactly what you want.

After a little bit of tinkering, I managed to implement the command into requests.json, creating a working proof of concept.

Front end
As I was writing the back end, I began to realise that the idea of metadata in a card wasn’t as practical as I thought it might be. My plan was to pass two items through the JSON response, one of them being the metadata, but I realise it’s hard to split the metadata apart, and I’m only starting with making a minimal proof of concept.
The key defining element here is a list of cards, this will be a state in React, because it’s going to be updated constantly. It’ll be an array of objects.
Unfortunately, I fell a bit behind here and lost an entire day, due to my laptop failing. Thankfullly a basic proof of concept wasn’t going to take a long time to make.
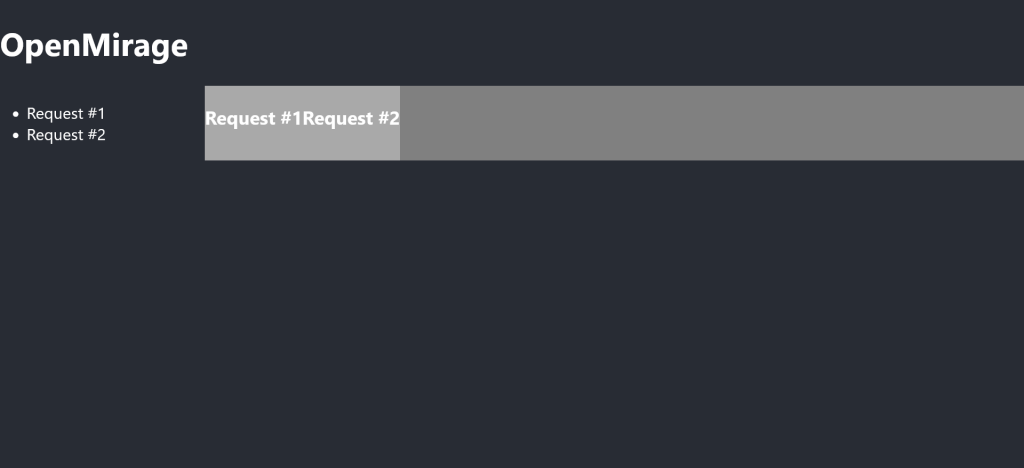
The basic proof was very rough, but it showed how the app was going to be structured. An hour later, you can see it taking the shape of the wireframe.
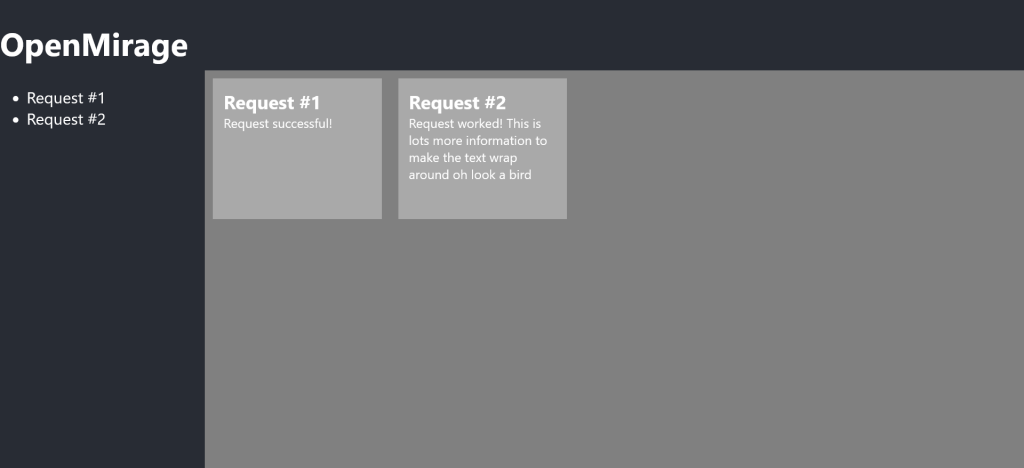
Bear in mind, I have this draft due tomorrow, and I still have all the API functionality to connect yet.
My main concern for getting this done is the form function to add more cards. I know I can delay the delete function and all the extra project.
The idea of how user input works is it’s dynamically populated by the API.
- A user clicks on the box to see what requests they can make, a request is made to the server to see what kind of requests a user can do
- A user selects a request from a dropdown, the server gets a request asking what arguments are required for this request, some textboxes are created for the user to input arguments based on the response
- The user inputs the arguments, and submits the request, the server processes the request and returns it
- The frontend takes the response and formats it into a card
And after many commits, cups of tea, and asking Copilot for help, the first working draft is done!
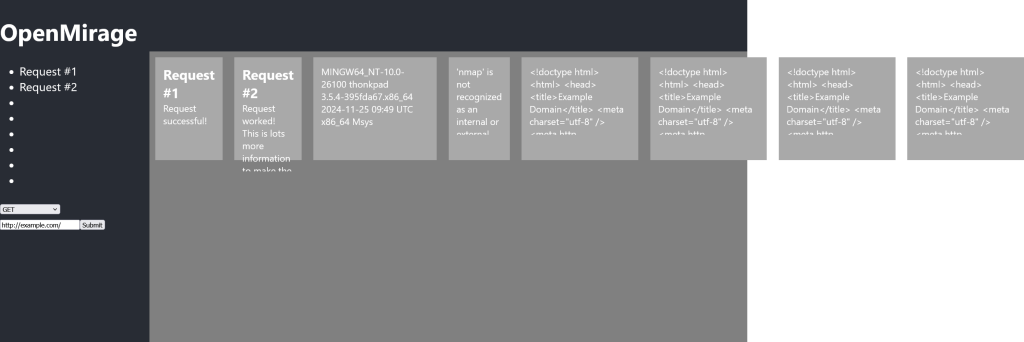
Emphasis on draft, this still had a long way to go, but at this point I had been in the zone for so many hours and I was very tired. I knew I needed to go back on document my code before I came back to this later and tried to figure out what on earth I did.
The first draft
So the first major milestone was hit, MVP #0 was released on GitHub. During this sprint, I noticed a few issues which might make me adjust my design.
- Metadata isn’t practical to implement
- When the command is switched to an alternative, the textboxes aren’t cleared, leading to potentially incorrect data being entered
- The text boxes need proper labels for accessibility as the placeholders aren’t good enough
- The summary list should be a scrollable list like the card display
I made issues for these on GitHub.
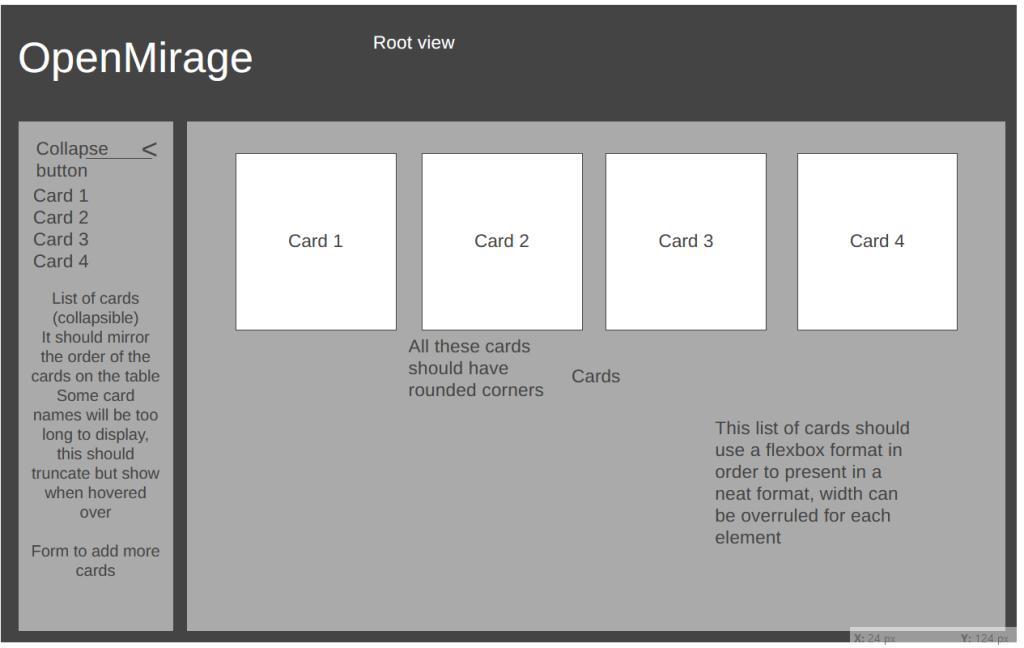
I read remade the wireframe to keep track of the metadata being removed.
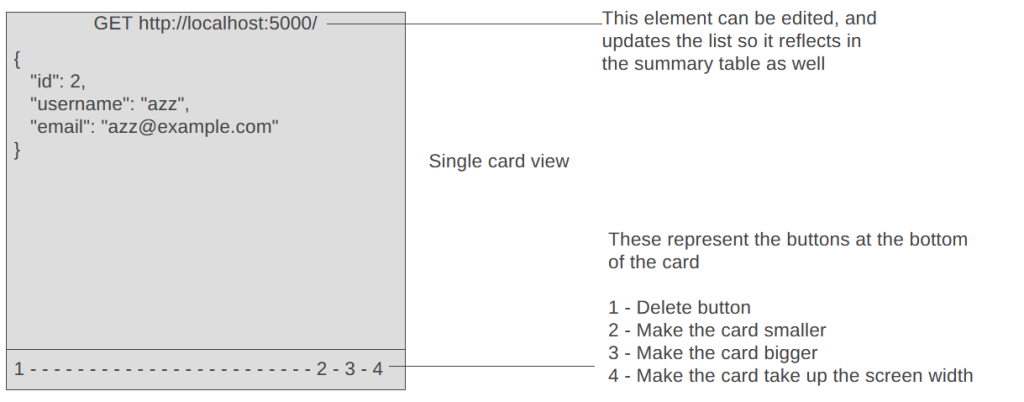
Refining
One thing that particularlly annoyed me was the roughness of the gituser command.
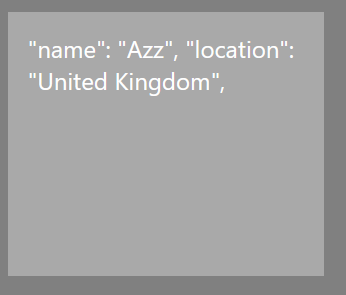
While it worked, it wasn’t nice to look at. Ideally, there would be no speech marks, no commas, and it would be seperated with each value on new lines.
The new line was was just a quick CSS tweak. Simply adding `white-space: pre-line` fixed that.
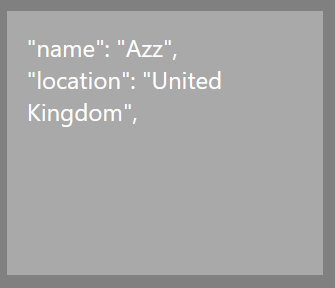
Now Linux has countless command line utilities, and I knew this was likely going to just be a case of removing the speech marks and commas.
After a few hours of tinkering and trying out different things, I realised that grep wasn’t behaving as intended, so I changed my approach, and managed to remove the commas using sed.
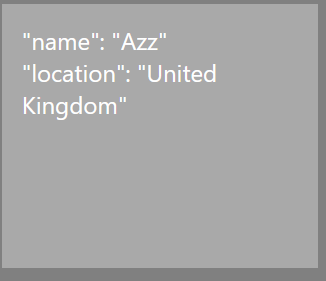
At this point, I’d been trying many different things to escape the speech marks, but was unable to. It was neater and more understandable which was the priority, so this could be placed on the backburner.
The next priority was making the card CSS work properly. As you can see in the photos of the first draft, it didn’t really wrap around properly.
I’d made some pretty obvious CSS mistakes in rushing to create the frontend, which were soon picked up and cleared up.
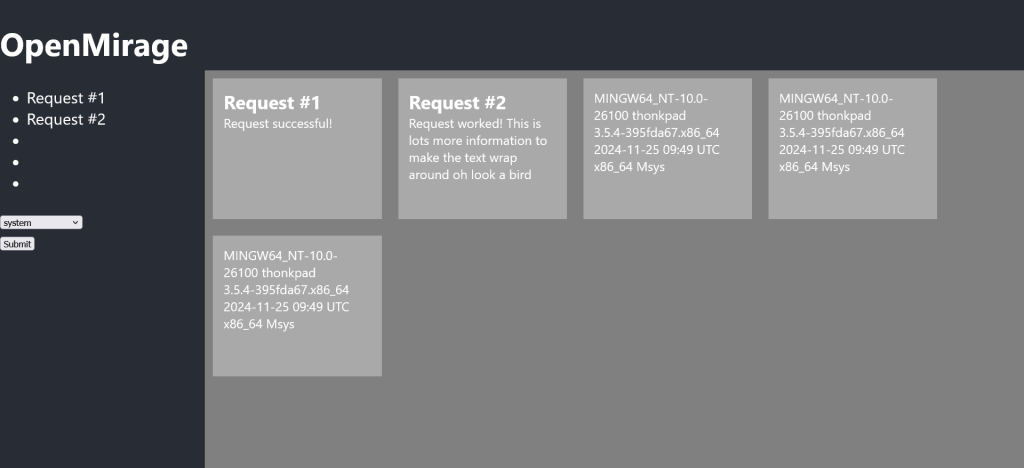
At this point, I liked the form on the bottom left of the site, and began wondering if this is a more practical solution than having a pop out form. Every command I had built up to this point only took one or no parameters, so it wasn’t much of a chance to test it. I decided I needed to make a more complex system to try it.
As it turns out, it actually looked ok!
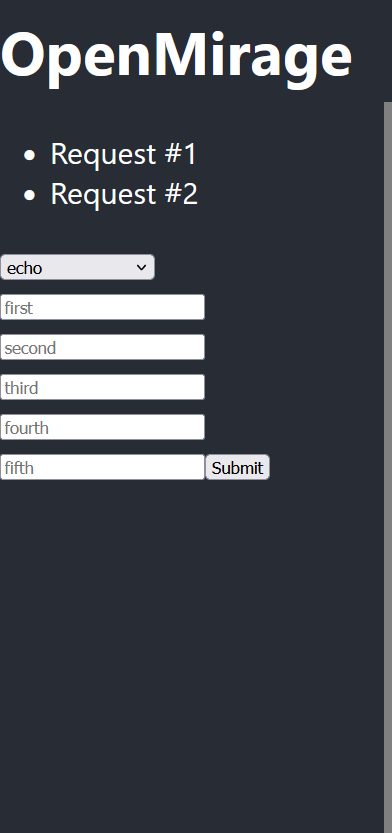
I realised if I had a box at the bottom of the summary list containing the form, and a box on the top containing the summary list, it could reduce the complexity of the program massively.
I adjusted my wireframe to reflect this.
And after a little bit of development, I had a working system.
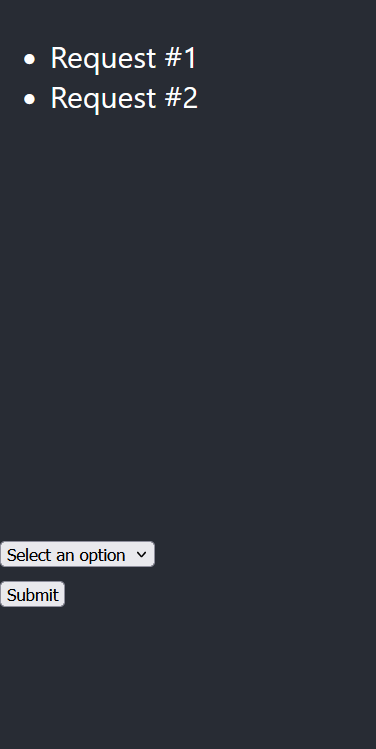
Besides the default CSS on the form fields, it worked and looked well.
The next element that’s really irrating me, is the lack of titles in cards. So I’ll tackle that next.
The first thing that puzzled me about this is how I was going to save a title. The problem is with dynamically processing a form in React is you have no idea how many variables are going to be in certain places, and this can make it tricky to figure out what a specific variable is. Thankfully there’s React state which will cover this and make it incredibly easy to edit.
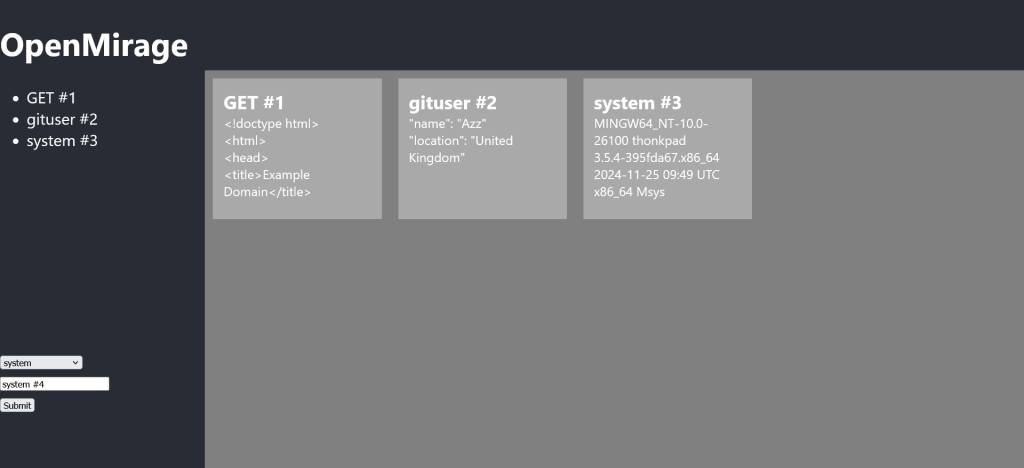
The only thing that really bothered me at this point was the default CSS on the form that stuck out like a sore thumb.
According to my schedule, I was ahead, so I decided it’s a good time to try GitHub co-pilot to speed up the process. It’s first job would be clearing up the CSS for my form, while I woke up on a cold Monday morning.
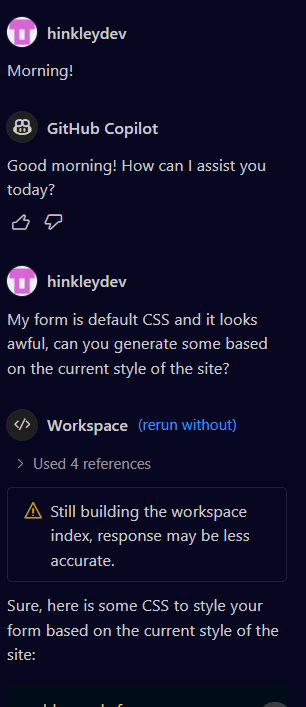
Soon after it wrote some code, I asked VS code to transfer it over. While it did work, and I liked the style, it did have a minor fault which broke the style of the site around it.
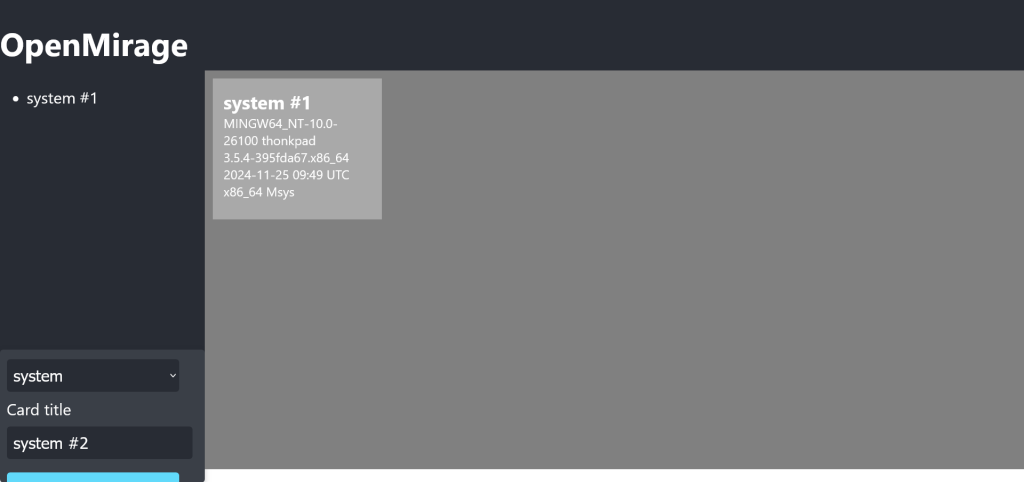
Thankfully, it’s just CSS, it’s easy to pick apart and debug.
I think this is a good use case for AI, to give a general rough guideframe of a design. I’ve used AI in the past for writing backend code, but it tends to be detrimental, as you start debugging it, and you have no clue where to go next because you don’t know the flow.
On the topic of guiding, I decided to ask AI why the form isn’t clearing when a command is changed, as this makes the user interface a bit confusing.

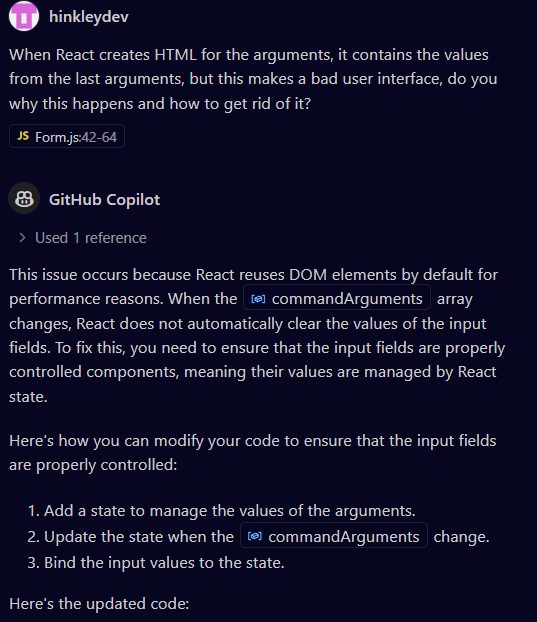
While I understood that explanation, I couldn’t wrap my head around the code it wrote.
Amazingly, you can ask co-pilot for more comments to get a deeper understanding of code before you add it.

However, this was a bit too ambitious, and caused the entire code to break. I know how this story goes, pulling out my hair trying to debug the code. This was a low priority issue. Roll back to the previous commit, and let co-pilot tackle something a bit easier.
I wanted a placeholder card for when the server is making a requets, my basic idea for this is to add a card to the array, and replace it when it’s done processing.
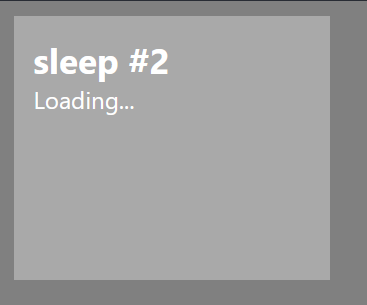
Done! But it doesn’t look very nice, ideally I want a little animation in there.
First I’ve got to make a class that that animation to attach to, I don’t want countless if statements in the main code so I’ll add it to the block render code. Now I have a different class of card that will render when it’s loading. Now, will co-pilot make it pretty for me?
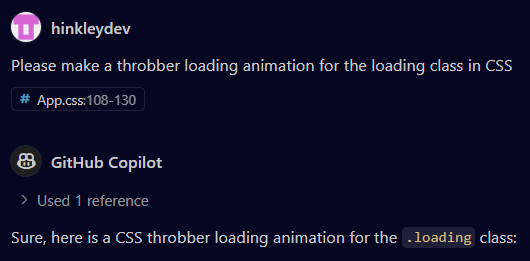
It had all intentions to do so I’m sure, but the loading symbol wasn’t what I hope for, it more acted like a DVD logo bouncing around the box than spinning inside it.
Maybe I expected too much of it, let’s try something simpler.
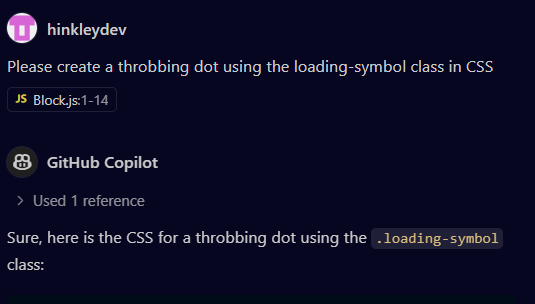
Works! Just make some adjustments, and push it to main!
However I had long been putting off the most complex difficult part of building this app, the buttons which should enable the flexibility of cards to take up as much or as little space as they needed.
The idea I currently had in my head was that for each card, it would have a state detailing exactly how it was supposed to display, then these states would be reflected in the inline CSS.
Anyway, it was a good time to take a break from the screen, have lunch and come back fresh.
After some lunch, and a bit of tinkering, it was done!
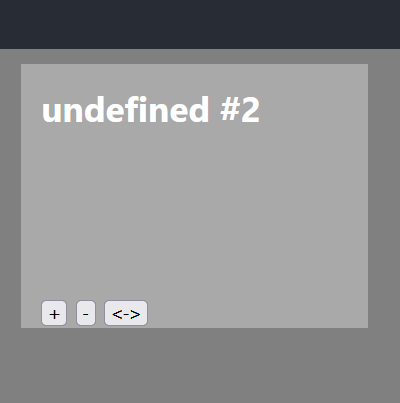
Not pretty, but functional.
Now the delete button. My preference isn’t to pass in elements, but pass in function calls with parameters, so I needed a method that could remove a card from an array by it’s index, and hand over the button to do that to the block function.
Scarily, co-pilot is already ahead of me.

I was putting the buttons in order according to the wireframe, but then I realised it made a bad user experience.
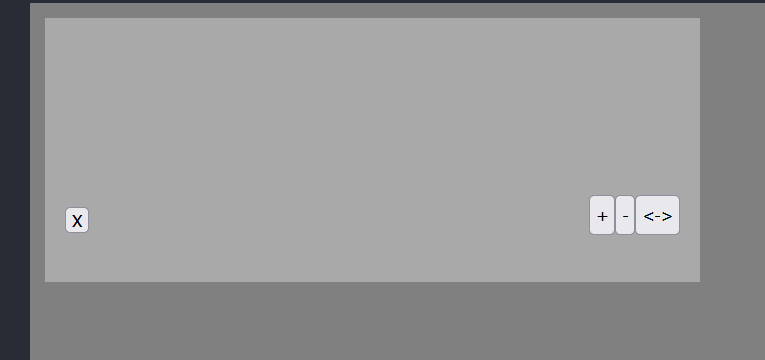
I realised while having buttons on the left and right is fine with a static card, when cards are constantly moving, you’re always looking for the buttons, so I decided we’ll reduce it all to one small set.
After some working out of the best way to structure the buttons, and some rough CSS, this was the end result.
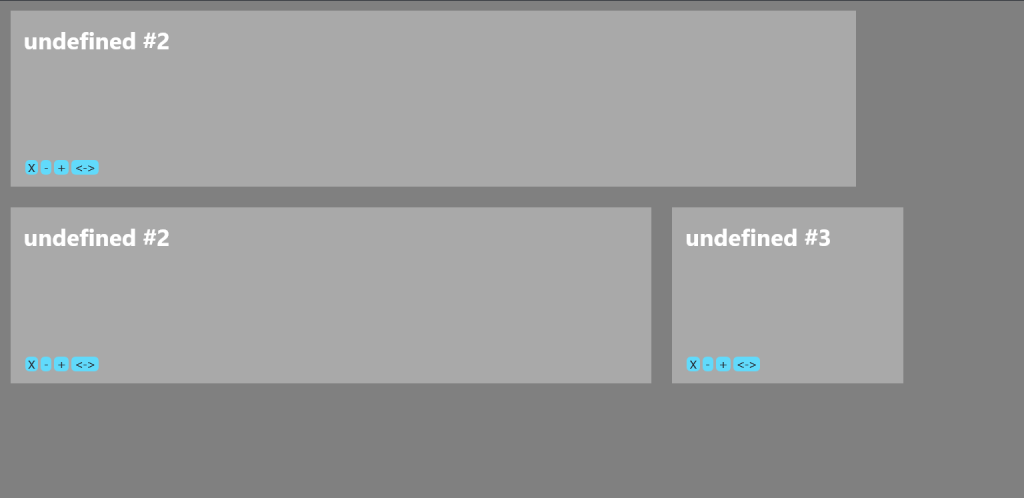
Next I wanted to make the list functional. My main goal is to bring in all functionality before I add the final touches to style.
I want to add a function where clicking on the summary list highlights the main card, the easiest way to do this might be using build in CSS focus.
After some frustration and going in circles about why I can’t focus on the div element, I ended up asking co-pilot for some help.
Soon after understanding this, I managed to implement the functionality. A great step, since this would also help with accessibility down the line.
I realised my brain had somewhat ran away, and I had swapped days 1 & 2 with days 3 & 4, working on the frontend instead of the backend. That ultimately won’t make a difference, but it occured to me I should probably package up the server properly, as I was running things in seperate terminals, which was one of the whole reasons I made this software.
After some back and forth, I had a working version.
1.0.0 was out, but my next goal was to make it more responsive depending on screen size. At this point it only worked based on percentage which wasn’t going to be very useful for users of bigger screens. But I was getting carried away again, I needed to make the list collapsible before I started looking at responsiveness further.
Again, with co-pilot writing many of the functions for me, it’s soon done.
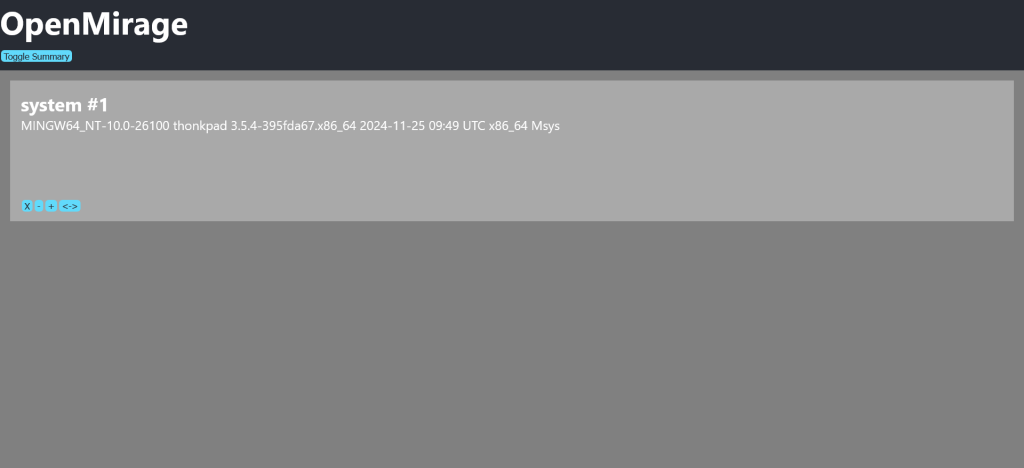
Ideal, now I can get onto solving the messy responsive design.
I hit a roadblock, while I wanted everything in a neat grid format, it kept splitting apart, making an aestechic mess.

Turns out I was trying to put a round peg in a square hole. Since I’d recently learnt about flexbox, I was trying to apply it to my code, when the best option for making a grid in HTML was… the grid layout. Who could’ve guessed.
It took a fair few hours to get a working grid setup. I’d never used the grid layout before this, I had so many different tabs open with different values. The first grid design wasn’t perfect, but it was much better than the last one.
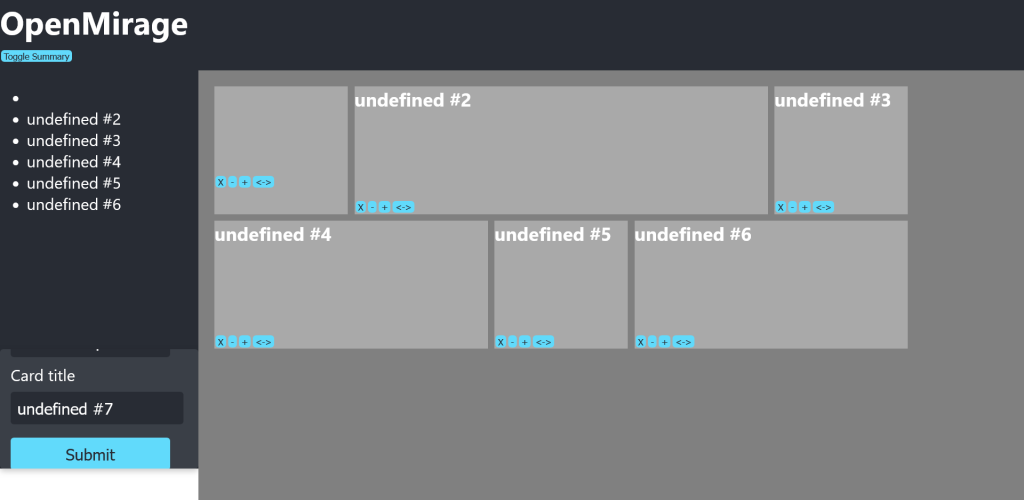
I realised that in the future, instead of using absolute values and letting the browser do the calculations, I should probably use media queries, because it breaks the full screen buttons so I’ve had to remove them.
Everything up until this point hadn’t been particullarly useful as a demonstration of the app, so I wondered what would be useful. Sat across to me in work, I could hear the people I worked with talking often about servers, so I wondered if I could add anything in my app.
The core command when it comes to servers is ping, checking if a host is online. So I decided that’s what I’ll add to my app. One of the key benefits of using it as a web interface, is that the output can be made much nicer.
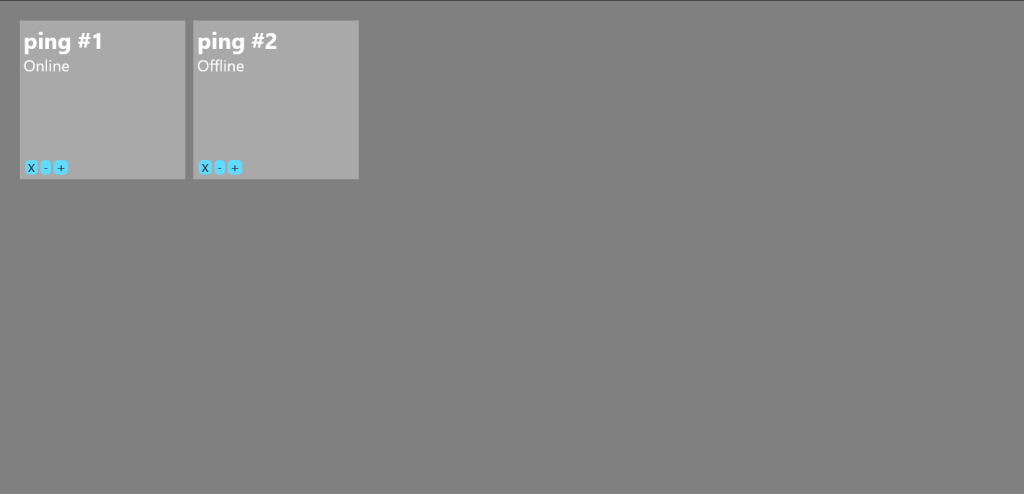
That works nice, but of course it opens the question of what was pinged? If you’re making software to replace multiple windows but don’t contain any info, it’s not very good software, so I need a method to include the hostname in the output. So let’s include the hostname in the output commands.
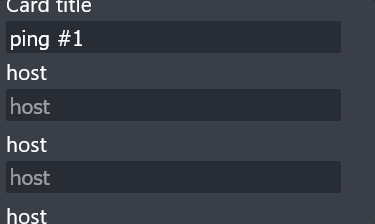
Ah, right, if I add the same variable multiple times into the same command, it treats them as different variables. Well I suppose I could enter it three times, but that’s horrible user experience.
This leaves me with two options:
- Adjust the command system so the same variable can be used multiple times after only asking once
- Change the command so it sets an environment variable of the command variable
Option one is going to be our best choice here, since this will likely benefit other commands down the line. Co-pilot can carry out this little fix for me.
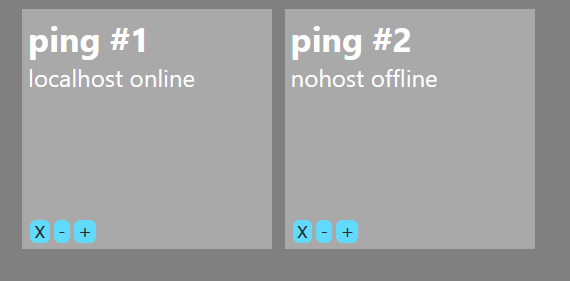
Perfect!
One thing I realised I’d been entirely missing was the ability to respond with errors. I programmed it into the server to respond with a different status code when a command failed, but didn’t do anything with that information in the frontend.
I decided the obvious answer to highlight errors was a red border. Space is a premium on a site like this, and I didn’t want red flashing lights all over it.
The much more tricky part of this was telling the commands to respond appropriately if something went wrong. That’s mostly a case of trial and error, but eventually, I got what I wanted.
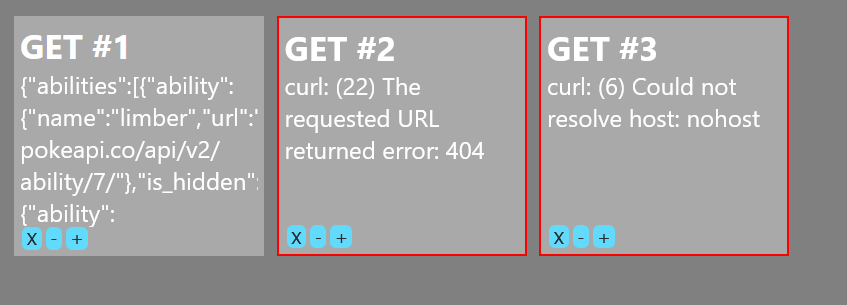
I decided that’s enough major changes for now, time to make a new release. And so V1.1.0 is released, time for me to take a break from the screen and recharge.
By this point, my work was just about done, I just wanted to make it look a little smoother and more polished.
During polishing, I ran into another issue. Through being a little too optimistic about time frames, I had pre-emptively changed the easy development environment to a production ready environment. So now if I wanted to see what I tiny change looked like, I had to save the changes, restart the server, wait for it to rebuild, come back online, then refresh to see what it looked like. Not much, but a pain when you’re doing it everytime.
So I had to put it all back together, and return to using a dev environment. I could make a blog post of all the lessons I’ve learned in coding, I should.
Realising I was nearly done, and I still had a day and a half of time before I had to roll out deployment, I had an idea for another function. A printable interface.
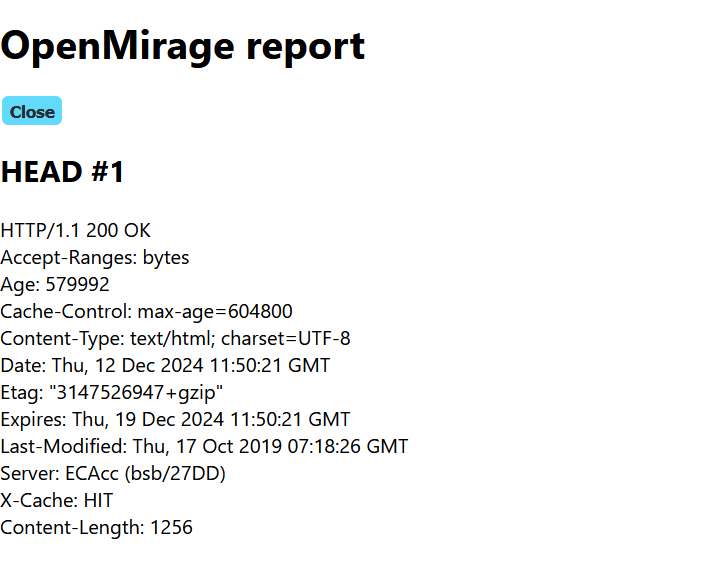
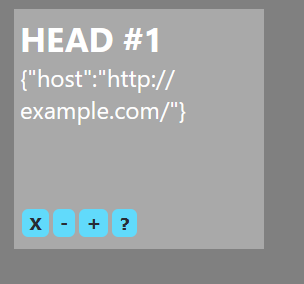
While it was easy to make, it did expose an issue in the fact that the data isn’t much good without the context. What URL was this HTTP request made to? You had no one of knowing unless you made it yourself, and even then you might’ve forgotten if you’ve been working for a few hours.
Context is fairly easy to add to the print page, you’ll just need a loop that goes over the data for each command, but I began wondering how I’m going to add it to the cards. My first idea in mind is a small button that flips the card over to reveal the context, but let’s see a proof of concept on the printer first.
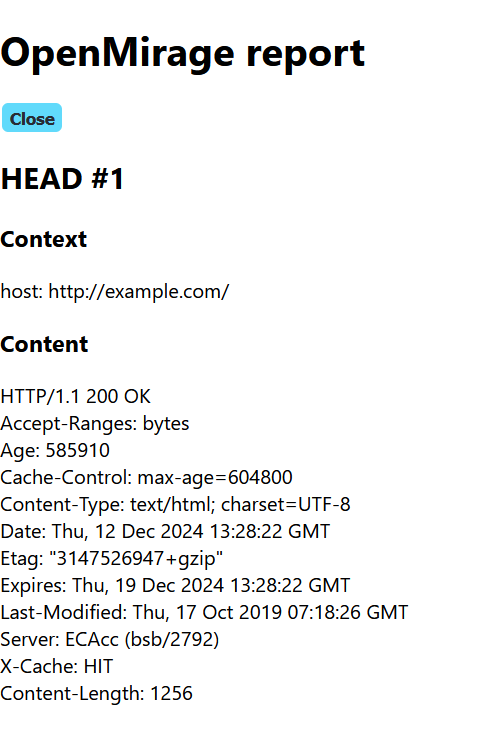
Works well, I added a view context state to the card block, and soon co-pilot filled in the blanks and I had a working system.
Deployment
I knew at this point, though that app wasn’t perfect, I was getting pretty close to burn out, and there wasn’t really anything else that could be done in such a short amount of time, so I decided ot deploy early.
I’m very traditional in the sense I usually deploy on a VPS, as I get the most control, however, I thought I should probably try something different. After all, I was deploying not only a new app, but a new app I’d wrote in a language I wasn’t hugely experienced in. Setting up a server alongside that might be detrimental to my progress.
While it may seem counter intuitive to what I just said, we’ll start by hosting it on a raspberry pi, that way I can see the error messages as they come back. The ideal plan here is git clone, npm install, npm build and deploy, and everything works, but we’ll see!
After logging in, downloading Node and NPM, I began downloading the dependancies, and then half way through realised that I hadn’t even pushed my changes to GitHub. Oops.
After spending half an hour downloading node_modules (I went from developing on a ThinkPad T480 to deploying on a tiny raspberry pi 2), I could finally build.
After 40 minutes of downloading and building, the little pi pulled through! And I could see my creation on the web browser when I went to the Pi’s IP address!
Two things occured to me though when I saw the interface being set up:
- Many of those packages have warnings on them about vulnerabilities
- Nmap is a great tool and great demonstration, but the vast majority of systems won’t have Nmap installed, and trying to install Nmap on a PaaS is more hassle than it’s worth, so I’ll have to make a demo branch which only contains commands which are a given in the system
After some working, I have commands which can ping a host, get a HTTP server version, FTP server version, and SSH server version. Only by using the ping, curl, and netcat utilities.
Now it’s time to address the package vulnerabilities, fingers crossed, no changes break anything.
Running NPM fix seemed to be ok, but running NPM force fix seemed to… multiply the vulnerabilities?
After investigating, I managed to bring it down.
I set up a Heroku account and asked to deploy the demo branch, but unfortunately, it tripped at the first hurdle.

Thankfully, Heroku pointed out the Node.js version wasn’t specified, so that gave me a good entry point to try.
So I retried, and it failed again. I then realised Heroku had switched to the main branch, which probably saved me hours of frustration.
I noticed the error log said the package-lock.json had some issues, so I got node to regenerate it.
And it worked! My app was live on Heroku!
So I started running through my usual tests; FTP works, check, SSH works, check, HEAD works, check, ping works… no, it doesn’t. For some reason ping was instantly returning offline for every single host I queried, even localhost. My initial thought on this is that ping is exiting due to a bad argument, returning an error, and thus the server is saying that host is offline.
To my surprise, ping doesn’t even exist on Heroku dynos.

Very unexpected, given curl and netcat exist.
Co-pilots suggestion was to use curl to check if a web server responds, but I already have a curl command for checking web servers, and the ping command was designed for anything connected to the network.
At first I thought if there might be a NPM module avaliable which could be used on the command line to ping, but none of them had command line support.
My next idea was to use the eval function of node to run them from the command line, but it turns out most of them are just wrappers of the ping command, so they wouldn’t work anyway. I went back to trying to dig out a ping command on Heroku, and seemed to get sent in circles.

I’m not a fool, I know a ping command for a demonstration isn’t that important, not going to spend the next three hours pulling my hair out over it, I’ll replace it with something else.
A site I use often which I really appriciate is ifconfig.co, they have an API for returning IP information in JSON format, which will be really useful here.
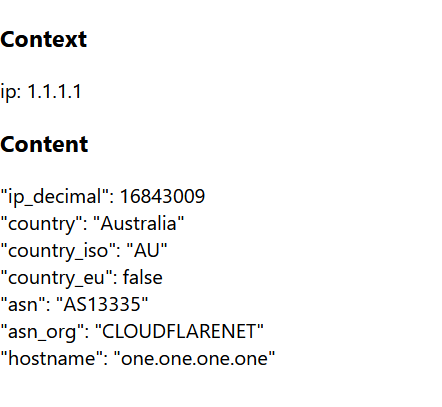
Great… but it doesn’t work in Heroku. This is why you don’t deploy on a Friday. Oh well, this is why I left plenty of time to figure out all the little issues. The curl command isn’t returning properly. Time for a weekend reset, I’ll figure it out on Monday.
On Monday, I sat down at my computer, and ran the same command again, it failed the exact same. The confusing part is; curl is calling an API, and that API request is being blocked, and when you inspect the response, it requires you to verify yourself as human. Why on earth is an API request bouncing back and requiring human intervention to work?
I was hoping that over the weekend, the system would ‘cool down’ and the API wouldn’t be blocked any more, but got the exact same response. At this point, I’m second guessing my choice to actually deploy the app. Not only does the server lack basic commands, it seems to be blacklisted. I can’t be sure exactly what’s wrong with it, but I don’t want to spiral into a sunk cost fallacy.
I decide the next best course of action is take down the deployment, and build it in a more optimised way for local use, plus making a development branch to make it more efficient. Ideally I wanted a system that can reload on the fly when a change is made, but that’s inefficient since it takes two commands constantly reloading.
A list of things that need doing for a local build:
- Hot plugging for the commands file
- Runs from the optimised build folder but does not rebuild it everytime it’s rerun
- Comes with an feature that can automatically detect new builds and give an option to download them
- Automatically opens the app in the browser on a port which is unlikely to be occupied (I decided to use TCP 7172, chosen after the most recent commit, and not a registered port on the Wikipedia list)
After half an hour of tinkering, I realised it was going to be very tricky to implement the npm commands to reload the app everytime a new command was added, it might be worth implenting a basic reload function.
One major issue I sunk into after I started converting it from online to local, was an experience of spaghetti in git. After working on the functions, realising I was on the wrong branch, attempting to transfer them over to the main branch using VS code. It snowballed, and got messy.
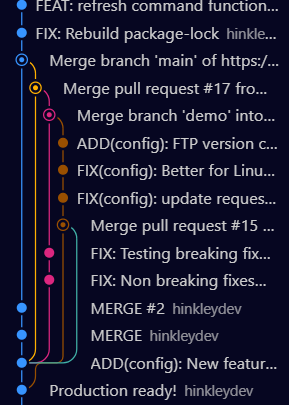
Needless to say, as soon as this was resolved, I moved everything over to a new dev branch, and vowed not to work directly on main.
I implemented a reloading function on the frontend, but I realised the backend wouldn’t automatically reload JSON files if they were changed. Thankfully, I can use nodemon to reload the server whenever it detects a change in that file.
Through the combination of these techniques, I won’t get exactly what I wanted, but it’s a good compromise between performance and simplicity.
On building the automatic updater function, I ran into a bit of an issue. You can’t really test an updating script… without overwriting the script when it manages to update itself. This just took a bit of trial and error, but was eventually solved.
Opening up the app in the browser was fairly easy, as it was just an explorer command. The only hitch I got was that command returns one instead of zero, so npm screeches to a stop when it’s done opening. I fixed that by setting the command to run in the background. While this works in my bash terminal on Windows, I don’t have the other systems to test this right now.
At this point, I was only adding functions for the hell of it, so I decided once I confirmed everything worked, the rest of the time was dedicated to the presentation.
One frustration I kept running into, time and time again, was that I forgot all the little changes, like marking up the version numbers. I needed to set something up that would stop me going in circles.
Eventually I understood updating software wasn’t a simple operation, and I settled for leaving instructions in the README.md file.
I wanted to make a more accurate version of the server checking commands. I knew whenever I directly connected to another server’s SSH port, it displayed a similar response to the others, so there was a standard format response.
I began looking for specifics. I started digging through RFC 4253, and I found this in section 4.2.
When the connection has been established, both sides MUST send an identification string.  This identification string MUST be

SSH-protoversion-softwareversion SP comments CR LF
This answered my problems, since I knew every server would respond with a line starting in this way, so I could grep for this line and return it, or state that it wasn’t found.
Content everything I added was working, I merged it into main and made a new release.
Presentation
I took a course on Udemy about business presentation. While it was more targeted towards entrepeneurs than internal employees, it gave me a good idea of how to format my presentation.
After making my presentation with LibreOffice Impress, I presented it to the class. I used a pre-recorded video for the demonstration to make sure nothing would go wrong, and it all went well.